
How to Sculpt BJD Head

Tools:
1: Draft+ Hard card case (B4 or A3 size is recommend. you can use the soft case also)
2: Sculpt tools (stainless steel is recommend)
3: LA DOLL clay (you can use SUPER SCULPEY as your convenience)
4: Big stainless steel Knife (slice the clay)
5: Cutter / Knife (Brain cut-apart use)
6: C-shape sculpture Knife (slight the eye-socket)
7: Brush (nourish water, nourish clay, nourish putty.)
8: Water
9: Roller
10: Burnish tools (Drilling and small part polish)
11: PUTTY 12: Mirror (check the symmetry of the face)
13: Clay scissor
14: Waterproof abrasive paper (150Cw, 400Cw to 2000Cw. 150Cw for rough abrasive use) and Oil clay for infill, Not show in here cause this picture haven't enough space Some people needs hair dryer to dry the clay, But easy to make it crack...

My way is base on the side-face of the character, about 2mm thickness clay to make the shape of the side-face. the width of the shape is about 5mm, It decided the whole thickness of the head lid. Prepare a Oil clay for infill, wrap it with a cling film.

After the clay dry, put the infill in the middle of Side-face, you need to consider the size of the hollow space to fix the size of infill.

Wrap the infill with clay, wait it dry. You can see an alien with a extremely gaunt cheeks when you look the obverse side...

- To turn the alien became a mankind (an ELF?), you need to fill the cheeks, sculpt the eye and brows-bone roughly. It doesn't take too many time to think about the proportion of the face position cause the nose and the mouth is fix on their position on the first step.
- Look at the layout, compare the shape to fix the face. Smooth the cheeks, correct the proportion of the eyes and lips.
- Dig the nostril, make the shape more detail. cut-apart the brain after the clay dried. remove the refill.

- It looks totally difference now. Mend the hindbrain to adjust the shape. Mirror is needed to check the symmetry of the face, normally You can't see the balance of both side, but the mirror show the weakpoint. Drill the hole for the position of the ears.
- cut-apart the brain again after the shape fixed. make the ear, use the mirror to check its balance. Modify the head lid. add an inner ring.

- slight the eye-socket
- Modify the neck hole, wait it dry.
- Start to polish, use abrasive paper 400→600→1000.
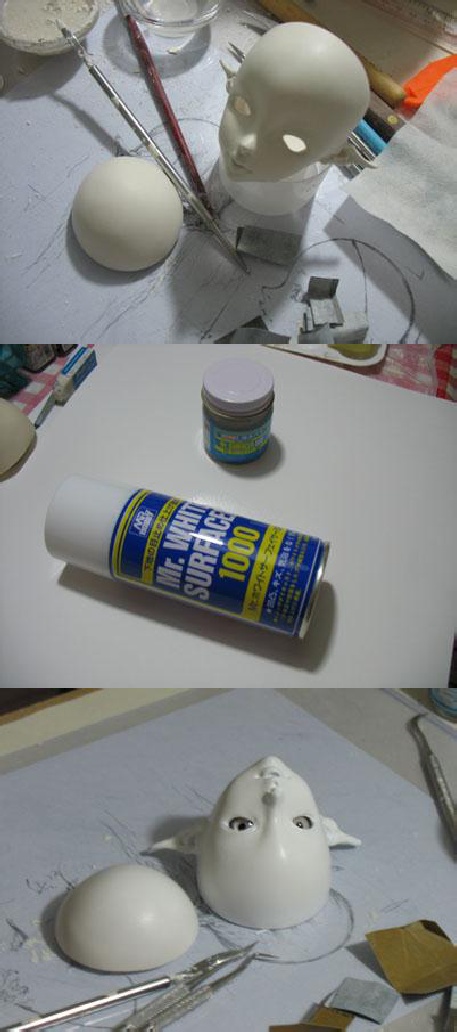
- use abrasive paper 1200→1500→2000 to make It become smooth, Looks like finish, but you can find out the most trouble thing after finish the polish. There are some dent and scrape on the surface.
- Use Liquid Putty and Spray Putty in order to repair the blemish. Some parts which is quite difficult to do the polish like nostril and ear, Liquid Putty is very easy to make it smooth.
- Finish!!When you use Putty to cover the LA DOLL clay, you can see a layer of fiber appear on the surface, use abrasive paper 1500 or 2000 to wipe the surface slightly and to make it smooth. Spray about 3 to 5 layers of Putty, use the Sculpt tool to fix some detail part like eyelids, Spray a fresh color and That's Finish!